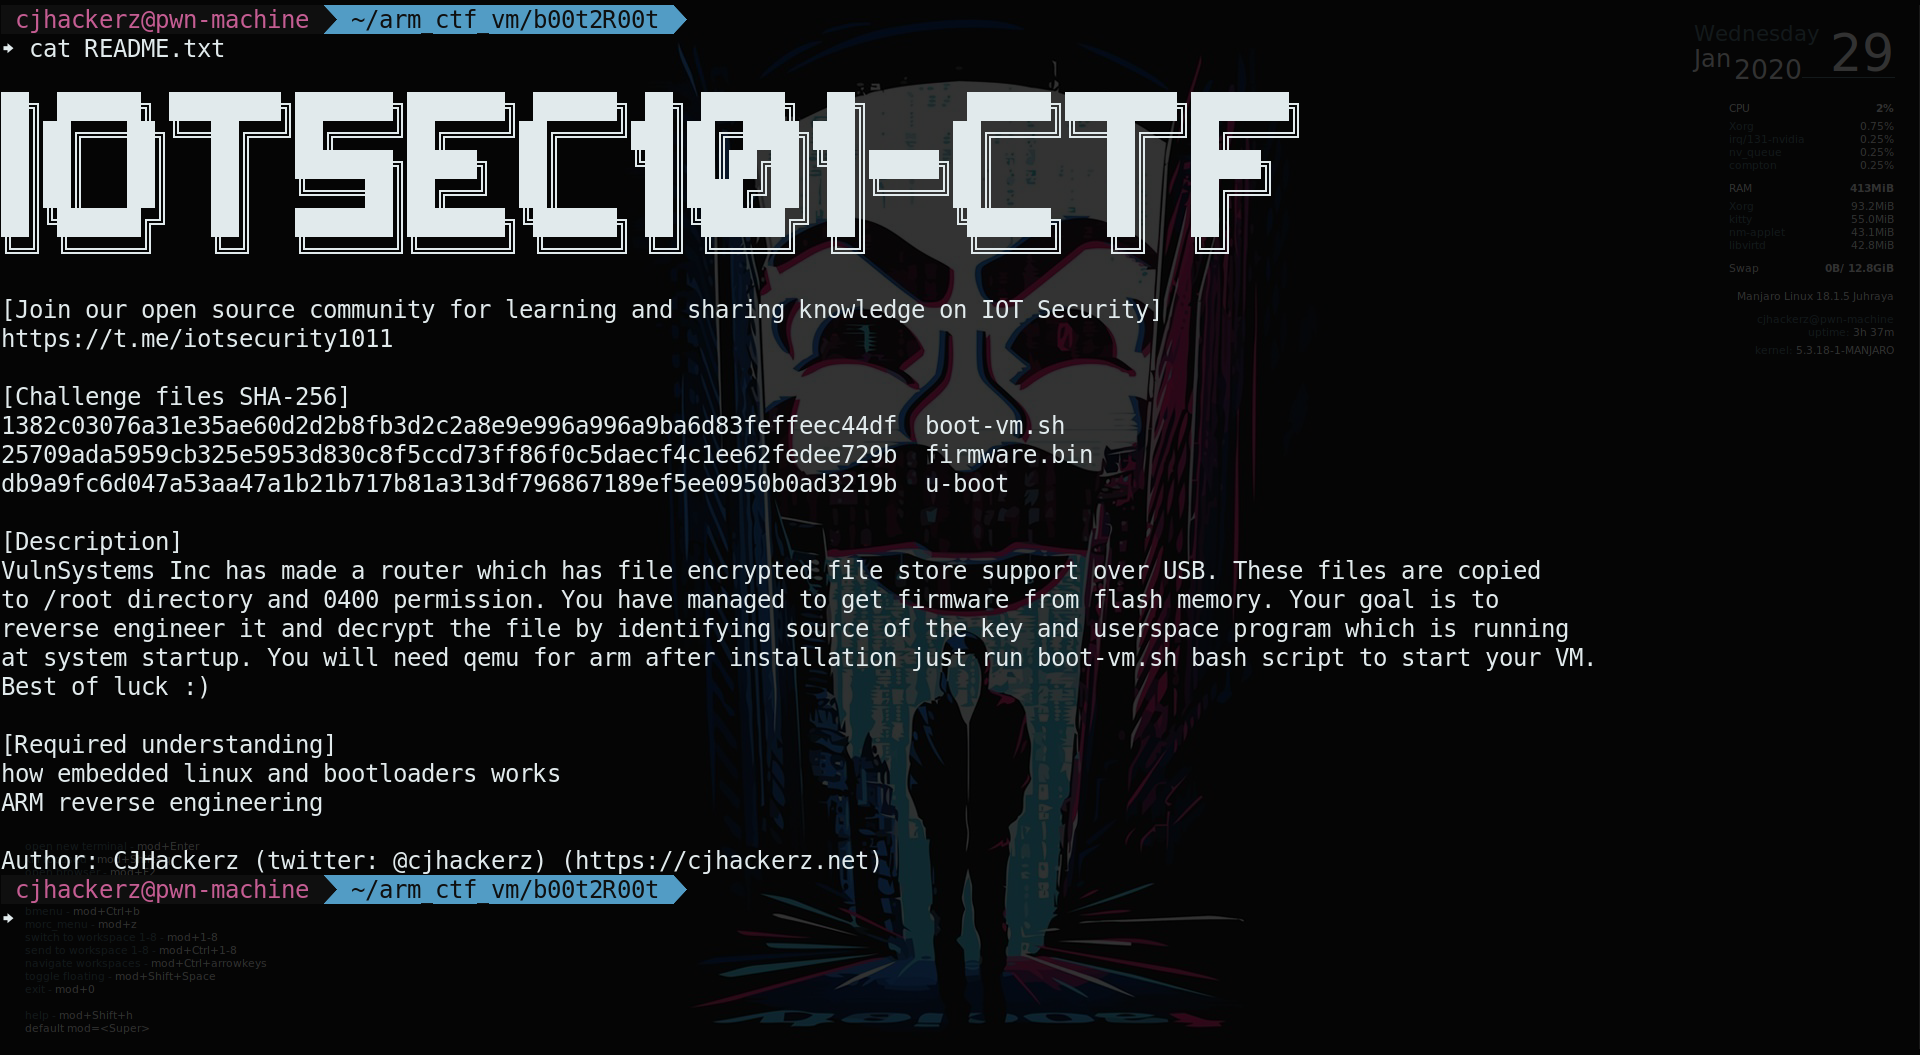
Few months ago I had released a challenge on IoT/Embeded security and put it up on various places inorder to allow people to solve it. Sadly long wait is over and now covid-19 in on rise gloablly there is no interests to solve it even in quarantine. So to give justice to my work I am putting up this write up together which you can follow along to learn and solve my challenge. Also next part of this blog will be released soon where I will discuss how to create such a challenge and make your Qemu firmware binary. Let’s get started!
Contents of b00t2r00t.tar.gz after extraction
$ tree b00t2R00t
b00t2R00t
├── README.txt
├── boot-vm.sh
├── firmware.bin
└── u-boot

0 directories, 4 files
All instructions were provided in README.txt inorder to start qemu vm for this challenge. See the screenshot in cover image of this article.
Firmware analysis
Before you begin obivious way to look at juicy stuff would be contents inside firmware.bin as we all know first step to do is run all mighty binwalk tool by /dev/ttys0 (aka Craig Heffner). If you new to iot security and don’t know who is /dev/ttys0 checkout his blog http://www.devttys0.com/ do follow him on twitter as well he is quite an inspiration for me as great hardware security revrese engineer and super dad for his beloved daughter (love your work and personality man no homo XD).
Enough praising /dev/ttys0 let’s move to our main content. Let’s checkout output from binwalk.
$ binwalk firmware.bin

DECIMAL       HEXADECIMAL     DESCRIPTION
--------------------------------------------------------------------------------
262144        0x40000         uImage header, header size: 64 bytes, header CRC: 0x2727D46F, created: 2020-01-29 07:51:06, image size: 4710192 bytes, Data Address: 0x60010000, Entry Point: 0x60010000, data CRC: 0xB6CB3D13, OS: Linux, CPU: ARM, image type: OS Kernel Image, compression type: none, image name: ""
262208        0x40040         Linux kernel ARM boot executable zImage (little-endian)
264672        0x409E0         device tree image (dtb)
294216        0x47D48         gzip compressed data, maximum compression, from Unix, last modified: 1970-01-01 00:00:00 (null date)
8875532       0x876E0C        device tree image (dtb)
8880044       0x877FAC        device tree image (dtb)
8916304       0x880D50        CRC32 polynomial table, little endian
8917328       0x881150        CRC32 polynomial table, little endian
8949433       0x888EB9        LZO compressed data
19398656      0x1280000       uImage header, header size: 64 bytes, header CRC: 0x220B17CC, created: 2020-01-29 07:52:38, image size: 1927313 bytes, Data Address: 0x60800000, Entry Point: 0x60800000, data CRC: 0xA51C60FF, OS: Linux, CPU: ARM, image type: RAMDisk Image, compression type: gzip, image name: ""
19398720      0x1280040       gzip compressed data, maximum compression, from Unix, last modified: 1970-01-01 00:00:00 (null date)
27525120      0x1A40000       device tree image (dtb)
Very first thing you notice is presence of uImage headers at 0x40000 (linux kernel) and 0x1280000 (RAMDisk containing init filesystem). uImage is wrapper file format used in open source u-boot bootloader for embeded systems. uImage contains information of type of image such as (kernel, filesystem or ramdisk) and where to load in memory area (mostly kernel at start of the ram with some offset). We will see more about it in bootloader analysis part of this blog. Let’s extract everything.
$ binwalk -Me firmware.bin
After binwalk do it’s magic you will see newly created directory in your present working directory called _firmware.bin.extracted
$ ls _firmware.bin.extracted
1280040  47D48  888EB9.lzo  _1280040.extracted  _47D48.extracted
As we saw previously in binwalk output for firmware.bin 0x1280000 is exactly where our uImage for init filesystem containing gzip compressed cpio (RAMDisk file) is present. Inside _1280040.extracted directory you will see binwalk has extracted cpio.0 archive file as cpio-root directory. By checking contents you will realise it is root filesystem for our emulated machine.
$ ls cpio-root
bin  etc   lib    linuxrc  mnt  proc  run   sys  usr
dev  init  lib32  media    opt  root  sbin  tmp  var
Filesystem analysis
Busybox init
As I have clearly mentioned in README.txt file when system boots our flag file is getting encrypted. Ask yourself a simple question at this point “When linux boots what is that first program with PID 1 responsible to start all other services, tasks and user space programs?”. Init system obviously and since this is embeded system we are dealing with, it will be busybox init system. By default busybox init system excutes simple shell scripts situated at etc/init.d/
ls etc/init.d/
S01syslogd  S02klogd  S02sysctl  S20urandom  S40network  S50filevault  rcK  rcS
You can see the big gotcha here with presence of S50filevault shell script file. Filevault that userspace program responsbile for flag file encryption. Here you can see file naming pattern for these init scripts S[number]file_name. Basically when busybox init start running scripting with lower to higher number. So S01syslogd will be executed first and S02klogd next. Like wise S50filevault in last before that S40network will get executed.
cat S50filevault
#!/bin/sh

case "$1" in
  start)
	printf "[FileVault] Encrypting File /root/flag.txt"
	/bin/file_vault
	;;
  stop)
	printf "[FileVault] Cleaning Up flag"
	rm /root/flag.txt
	;;
  restart|reload)
	"$0" stop
	"$0" start
	;;
  *)
	echo "Usage: $0 {start|stop|restart}"
	exit 1
esac

exit $?
By reading shell script you can guess what is exactly happening. When busbox init system excutes shell scripts under etc/init.d/ directory, anyof 3 argument (start, stop and restart) is passed to our scripts according to situation of startup or shutdown. At startup all script receives start as argument and during shutdown it is stop. So to handle these argument developer has to define cases for that. For our S50filevault it’s just calling userspace program binary called file_vault under /bin directory.
$ readelf -h bin/file_vault
readelf -h file_vault
ELF Header:
  Magic:   7f 45 4c 46 01 01 01 00 00 00 00 00 00 00 00 00
  Class:                             ELF32
  Data:                              2's complement, little endian
  Version:                           1 (current)
  OS/ABI:                            UNIX - System V
  ABI Version:                       0
  Type:                              EXEC (Executable file)
  Machine:                           ARM
  Version:                           0x1
  Entry point address:               0x67238
  Start of program headers:          52 (bytes into file)
  Start of section headers:          1579244 (bytes into file)
  Flags:                             0x5000002, Version5 EABI, <unknown>
  Size of this header:               52 (bytes)
  Size of program headers:           32 (bytes)
  Number of program headers:         7
  Size of section headers:           40 (bytes)
  Number of section headers:         14
  Section header string table index: 13
Root password caracking
To anylise stuff during runtime it’s important to crack root password. It makes life lot easy. Many routers comes with telnet feature and hardcoded root password which is weak and you can crack it by throwing your etc/shadow file hash from extracted filesystem to hashcat.
$ cat etc/shadow
root:$5$tteRhk9Y$7u0nhaiBjVi9TNXvMrGk/Nh7lDSeZfV7bROSOJFVbN6:::::::
daemon:*:::::::
bin:*:::::::
sys:*:::::::
sync:*:::::::
mail:*:::::::
www-data:*:::::::
operator:*:::::::
nobody:*:::::::
extract our root hash string and store it in file for processing with hashcat
$ head -n 1 shadow | cut -d ":" -f 2 > root.hash
While creating this challenge I selected password from SecLists/Passwords/Default-Credentials/telnet-betterdefaultpasslist.txt file. I extremely sorry for not including telnet service as hint, but I was openly ready to point you at this file for password cracking as hint after reaching to this path. Note that telnet-betterdefaultpasslist.txt has username and password combo where we only need passwords. This can be easily solved again with cut command.
$ cat telnet-betterdefaultpasslist.txt | cut -d ":" -f 2 >> telnet-betterdefaultpassonly_list.txt
Our hash string for root user starts with $5$ which indicated SHA256 crypt for Unix (-m 7400 option for hashcat)(for SHA512 to it would be $6$). Let’s crack it with hashcat and GPU power.
My cracking hardware in laptop
$ hashcat -I
hashcat (v5.1.0) starting...

OpenCL Info:

Platform ID #1
  Vendor  : Intel(R) Corporation
  Name    : Intel(R) OpenCL HD Graphics
  Version : OpenCL 2.1

  Device ID #1
    Type           : GPU
    Vendor ID      : 8
    Vendor         : Intel(R) Corporation
    Name           : Intel(R) Gen9 HD Graphics NEO
    Version        : OpenCL 2.1 NEO
    Processor(s)   : 24
    Clock          : 1000
    Memory         : 4095/9475 MB allocatable
    OpenCL Version : OpenCL C 2.0
    Driver Version : 20.08.15750

Platform ID #2
  Vendor  : NVIDIA Corporation
  Name    : NVIDIA CUDA
  Version : OpenCL 1.2 CUDA 10.1.0

  Device ID #2
    Type           : GPU
    Vendor ID      : 32
    Vendor         : NVIDIA Corporation
    Name           : GeForce 930M
    Version        : OpenCL 1.2 CUDA
    Processor(s)   : 3
    Clock          : 941
    Memory         : 501/2004 MB allocatable
    OpenCL Version : OpenCL C 1.2
    Driver Version : 435.21
Cracking password on my Nvidia GPU
$ hashcat -d 2 -m 7400 -a 0 root.hash telnet-betterdefaultpassonly_list.txt

hashcat (v5.1.0) starting...
* Device #1: Intel's OpenCL runtime (GPU only) is currently broken.
We are waiting for updated OpenCL drivers from Intel. You can use --force to override, but do not report related errors.
* Device #2: WARNING! Kernel exec timeout is not disabled. This may cause "CL_OUT_OF_RESOURCES" or related errors.
             To disable the timeout, see: https://hashcat.net/q/timeoutpatch
nvmlDeviceGetFanSpeed(): Not Supported

OpenCL Platform #1: Intel(R) Corporation
========================================
* Device #1: Intel(R) Gen9 HD Graphics NEO, skipped.

OpenCL Platform #2: NVIDIA Corporation
======================================
* Device #2: GeForce 930M, 501/2004 MB allocatable, 3MCU

Hashes: 1 digests; 1 unique digests, 1 unique salts
Bitmaps: 16 bits, 65536 entries, 0x0000ffff mask, 262144 bytes, 5/13 rotates
Rules: 1

Applicable optimizers:
* Zero-Byte
* Single-Hash
* Single-Salt

Minimum password length supported by kernel: 0
Maximum password length supported by kernel: 256

ATTENTION! Pure (unoptimized) OpenCL kernels selected.
This enables cracking passwords and salts > length 32 but for the price of drastically reduced performance.
If you want to switch to optimized OpenCL kernels, append -O to your commandline.

Watchdog: Temperature abort trigger set to 90c

Dictionary cache hit:
* Filename..: telnet-betterdefaultpassonly_list.txt
* Passwords.: 146
* Bytes.....: 1417
* Keyspace..: 146

The wordlist or mask that you are using is too small.
This means that hashcat cannot use the full parallel power of your device(s).
Unless you supply more work, your cracking speed will drop.
For tips on supplying more work, see: https://hashcat.net/faq/morework

[s]tatus [p]ause [b]ypass [c]heckpoint [q]uit:                                               Approaching final keyspace - workload adjusted.

[s]tatus [p]ause [b]ypass [c]heckpoint [q]uit:                                               $5$tteRhk9Y$7u0nhaiBjVi9TNXvMrGk/Nh7lDSeZfV7bROSOJFVbN6:realtek

Session..........: hashcat
Status...........: Cracked
Hash.Type........: sha256crypt $5$, SHA256 (Unix)
Hash.Target......: $5$tteRhk9Y$7u0nhaiBjVi9TNXvMrGk/Nh7lDSeZfV7bROSOJFVbN6
Time.Started.....: Sun Mar 22 20:59:35 2020 (0 secs)
Time.Estimated...: Sun Mar 22 20:59:35 2020 (0 secs)
Guess.Base.......: File (telnet-betterdefaultpassonly_list.txt)
Guess.Queue......: 1/1 (100.00%)
Speed.#2.........:     1058 H/s (0.75ms) @ Accel:64 Loops:32 Thr:64 Vec:1
Recovered........: 1/1 (100.00%) Digests, 1/1 (100.00%) Salts
Progress.........: 146/146 (100.00%)
Rejected.........: 0/146 (0.00%)
Restore.Point....: 0/146 (0.00%)
Restore.Sub.#2...: Salt:0 Amplifier:0-1 Iteration:4992-5000
Candidates.#2....: calvin -> 20080826
Hardware.Mon.#2..: Temp: 55c Util: 95% Core: 941MHz Mem: 900MHz Bus:4

Started: Sun Mar 22 20:59:29 2020
Stopped: Sun Mar 22 20:59:36 2020
Root password is realtek (told ya I am trying to keep this as real as possible :p) Don’t be happy flag is still encrypted.
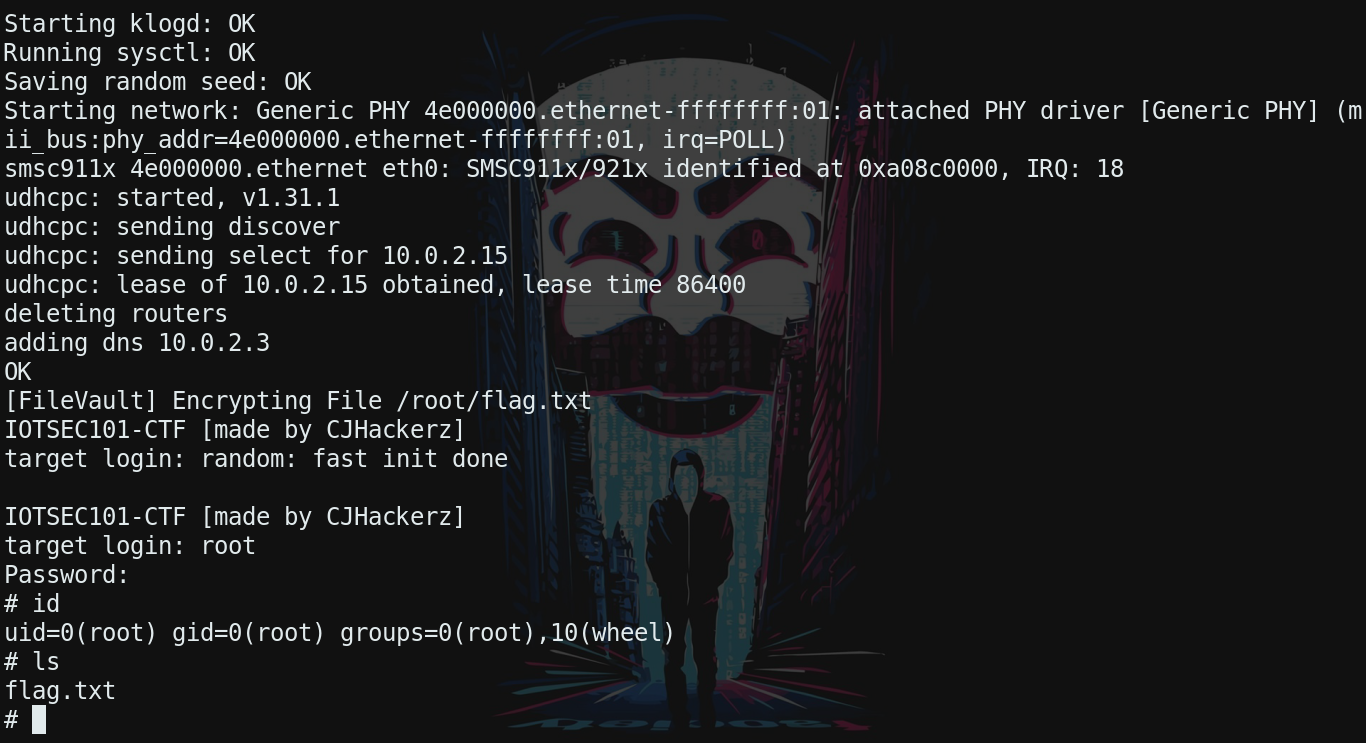
Sucessful login attempt with cracked password
Pwning bootloader
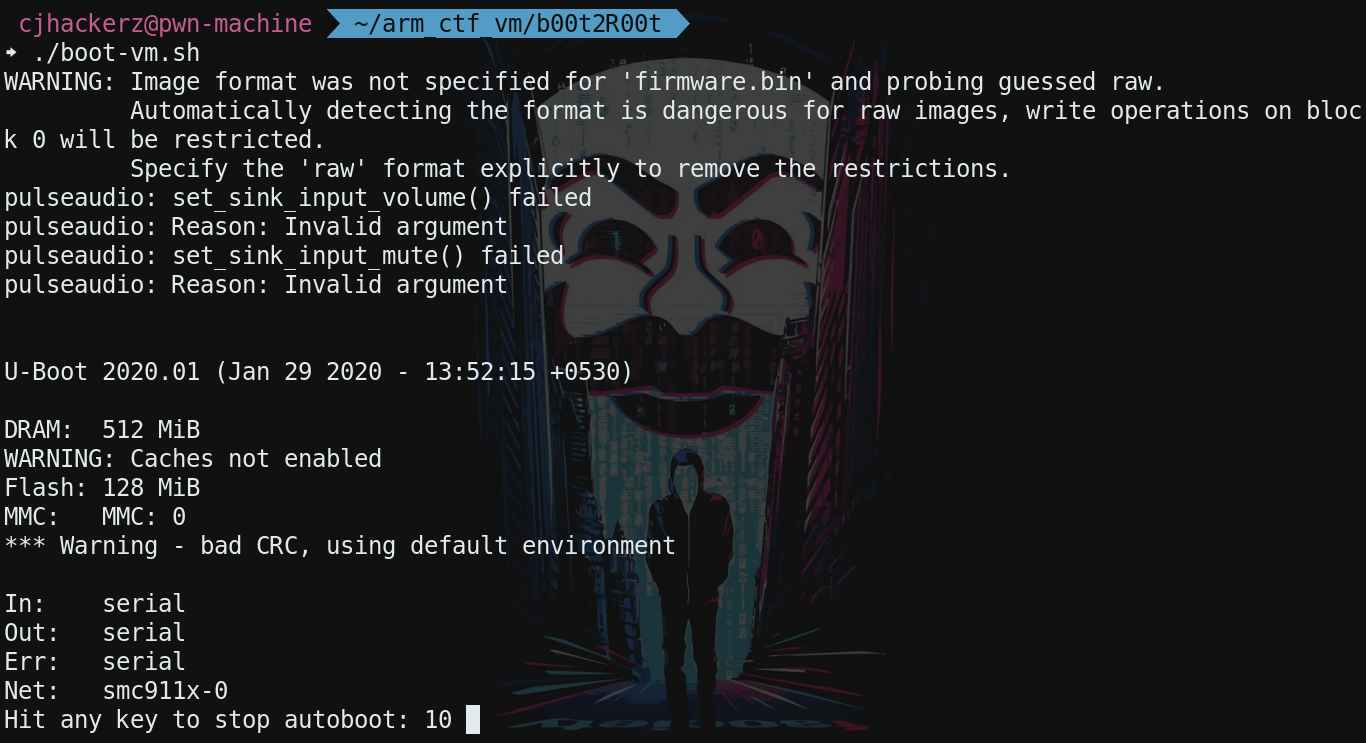
Bootloader prompt
During machine startup you have 10 second timer given to stop auto boot in bootloader. Just press any key from keyboard you will be dropped into u-boot command line. Type help to see all list of supported commands. Most useful one if printenv which allows us to print all or specific environmental variables set for u-boot. These variables are nothing but configuration settings telling bootloader how to boot system in various scenarios.
| Env variable | Usage |
|---|---|
| arch | CPU architecture |
| board | Name of hardware |
| bootdelay | Auto boot delay timer in seconds |
| baudrate | Serial buadrate of device |
| bootargs | holds kernel arguments passed during boot |
| bootcmd | command used in auto boot |
| dram | Total available ram size in mb |
Let’s checkout values for bootargs and bootcmd
=> printenv bootargs
bootargs=root=/dev/ram console=ttyAMA0,38400n8 FILE_VAULT=NOeHAVYuo6KRbtWxxk4ixkUM9maqs670fV7g6p7
=> printenv bootcmd
bootcmd=bootm 0x40040000 0x41280000 0x41A40000
From output above you can tell that kernel arguments are root=/dev/ram console=ttyAMA0,38400n8 FILE_VAULT=NOeHAVYuo6KRbtWxxk4ixkUM9maqs670fV7g6p7 which you can verify from root shell after cracking password.
IOTSEC101-CTF [made by CJHackerz]
target login: root
Password:
# cat /proc/cmdline
root=/dev/ram console=ttyAMA0,38400n8 FILE_VAULT=NOeHAVYuo6KRbtWxxk4ixkUM9maqs670fV7g6p7
Putting pieces togather
So what is happening here is that bootloader is passing custom kernel argument called FILE_VAULT since it is obiviously not linux default kernel peram. Busybox init system excutes ARM 32-bit ELF binary /bin/file_vault. Which is probabbly reading loaded kernel args from /proc/cmdline and extracts value of FILE_VAULT param as encryption key. Now we know almost everything to pwn this CTF only thing is left to reverse engineer that userspace program inorder to find our algorithm used behind it.
Reverse engineering userspace program
file file_vault
file_vault: ELF 32-bit LSB executable, ARM, EABI5 version 1 (SYSV), statically linked, Go BuildID=rfY8dzL4QWDivzT3tIof/yzSyL412r2SfnqiFM1uG/n7cCu_U_mAOMnAtnQZi6/emiAkqStHyqLllmeNH2E, stripped
File command gives us some instant gotcha, first Go BuildId= tells us program is written in go lang and is statically compiled binary. Symbol names are stripped as you would find the same in real life scenarios. This makes reverse engineering much harder since you won’t have human readable names for symbol names.
Here I realised my big mistake and why probabbly no one was able to solve it.
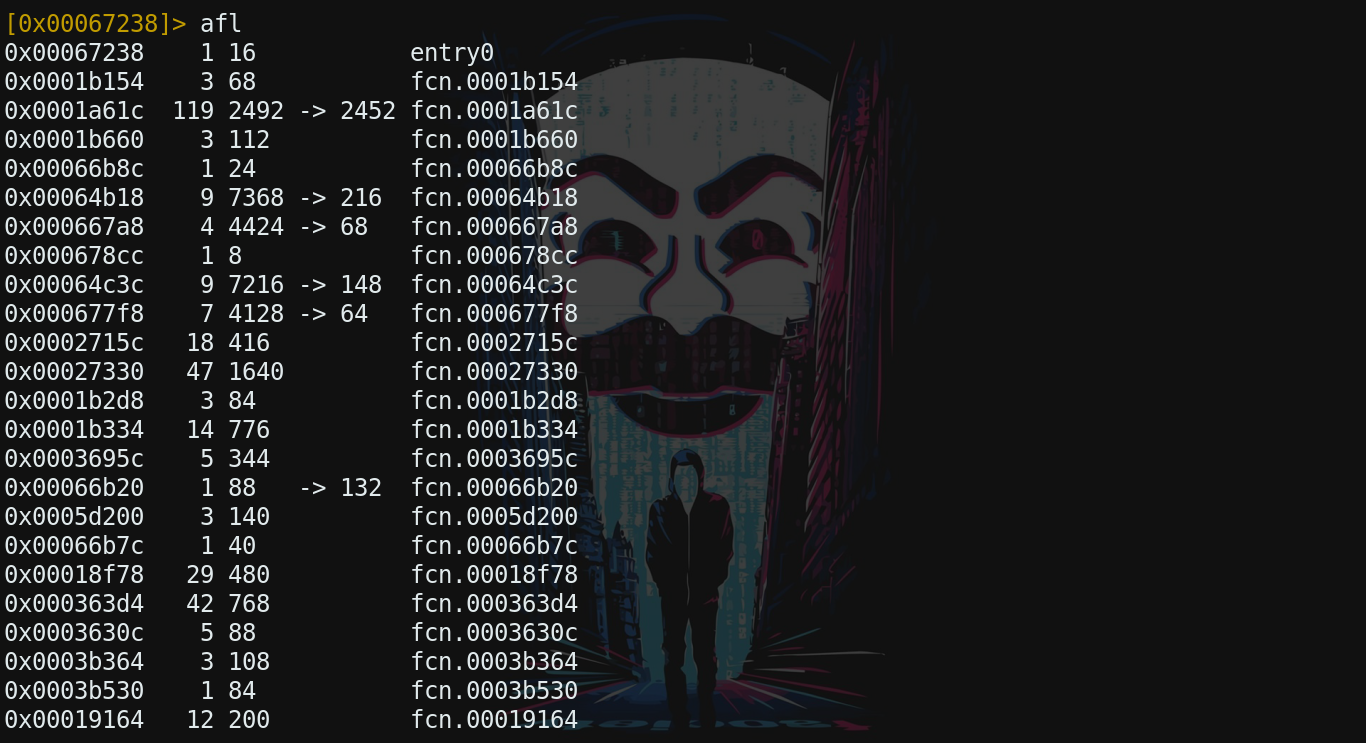
Big oopsie
You see since functions names does not make any sense it would take months to reverse engineer this binary without proper symbol table. Basically I should have created this binary by passing ldflags="-w" instead of ldflags="-w -s" in go compilation. And I shared firmware binary with symbols stripped. Now it’s too late to make any changes but you can find intended binary for reversing at here
Download binary from above link we will continue in Radare2
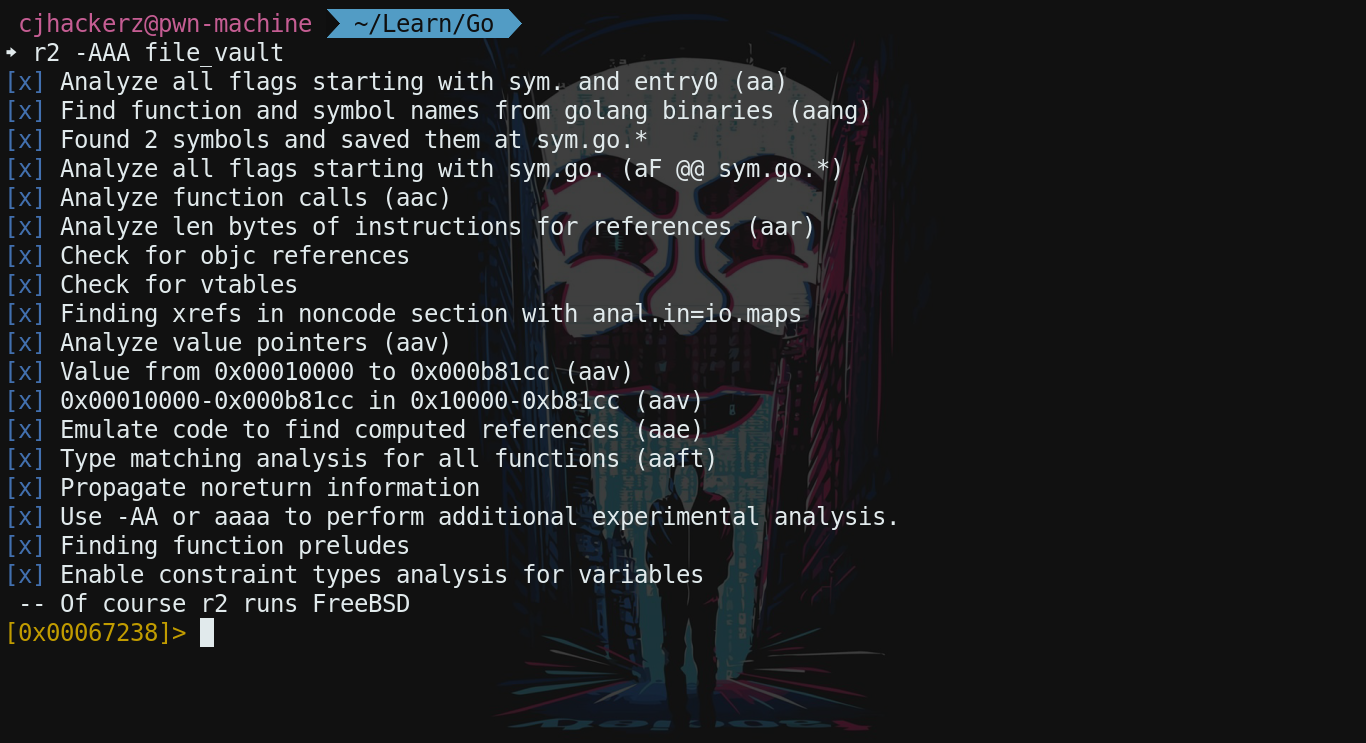
R2 is Great!
-AAA option in r2 will anlyze function names, symbol tables and all other things which makes your life easy in reverse engineering. Type afl (Anlyze Function List) inorder to see function names.
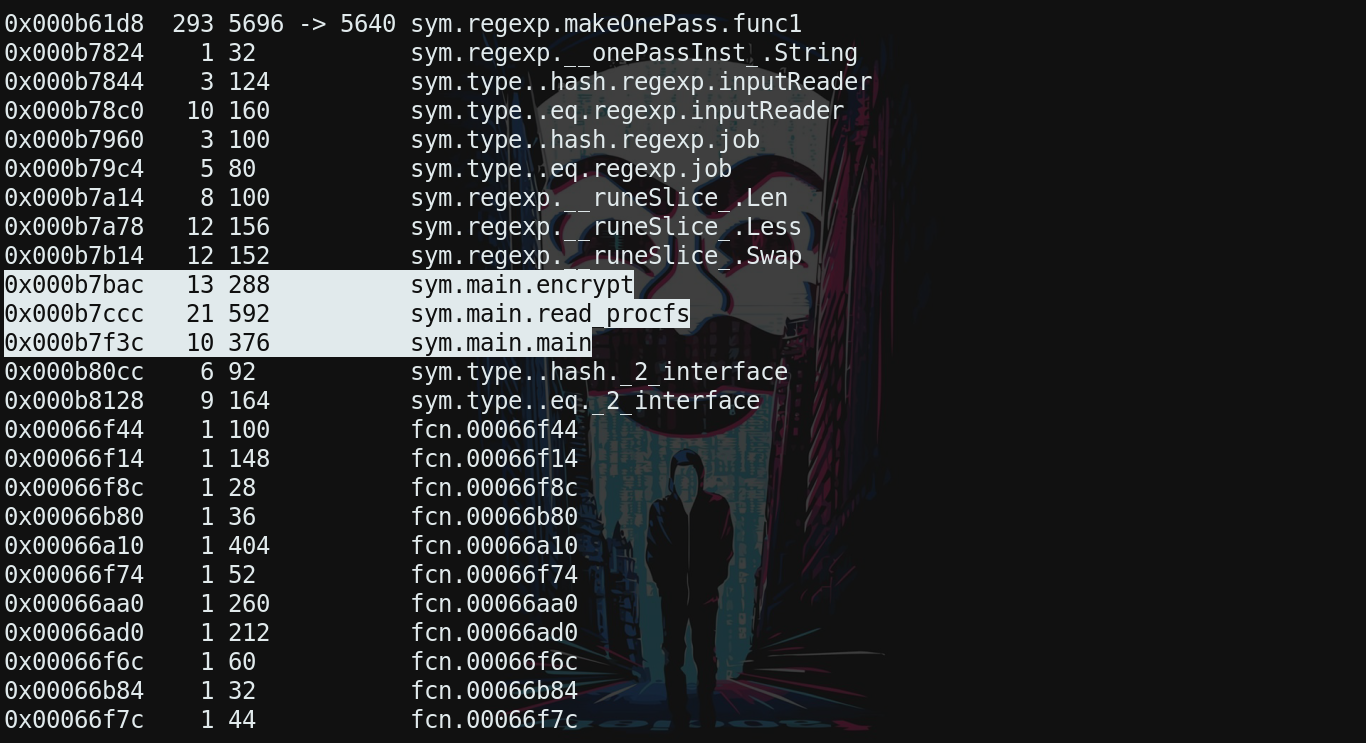
Our attack vectors
you can see 3 highlighted function names of interest now everything is clear as we predicted before. above 3 function you can see the some regex related function as well which are used in sym.main.read.procfs for extracting value of FILE_VAULT peram from /proc/cmdline output. Let’s switch to sym.main.encrypt in r2.
s sym.main.encrypt
To see dissassembly
pdf
Switch to visual mode
VVV
One instruction which clearly stands out is this one
0x000b7bf4 000027e0 eor r0, r7, r0
eor is ARM instruction for XOR. Yes so encryption function is not actually encryption but simple xor operation of key from FILE_VAULT kernel peram and data. So you can decrypt flag.txt file with same key which is NOeHAVYuo6KRbtWxxk4ixkUM9maqs670fV7g6p7
Boot VM, login as root and get bytes from flag.txt file with help of hexdump
$ cat flag.txt | hexdump -ve '16/1 "%02x " "\n"'
1d 1a 5c 1d 14 66 0f 31 22 62 0a 2a 07 44 1e 0f
35 23 65 10 2d 01 14 3a 5d 25 51
Copy these bytes from your terminal and save them to flag.hex file in your host/local machine by using text editor of your choice. And with help of xxd rebuilt your flag file. You may ask why we are doing this because our firmware does not have any client/server tools installed to tranfer files easily.
$ xxd -r -p flag.hex flag.txt
$ cat flag.txt | python2 xor.py "NOeHAVYuo6KRbtWxxk4ixkUM9maqs670fV7g6p7"
SU9UU0VDMTAxe0IwMHQyUjAwdH
which is base64 encoded flag string for IOTSEC101{B00t2R00t}. You can find this hardcoded inside file_vault binary as well that was the exact reason I encoded it in order to make it look like gibberish string.
That’s it folks. A painful CTF full of maker mistakes but lot’s of learnings on the way. If you liked this article please share it on your favourite social media platform it means a lot too me. It took me 2 weeks to create this challenge and more than 6 hours to finish this write up. Stay tuned for 2nd part of this aritcle where I will disscuss how I put together entire thing from kernel compiletion to firmware binary creation.
Download Link for this challenge: b00t2R00t.tar.gz
